
14 Tips for Sunrise & Sunset Photography
Photography Tips, Travel Tips / March 11, 2025 / 7 comments
I am a sucker for a good sunrise. I try to see at least one on my travels if possible. I once drove with two family members ninety minutes across Hawaii for a sunrise. To me, it’s a great way to start the day. On the other hand, sunsets are a beautiful way to end the day. Sunrises and sets are nature’s most breathtaking displays, painting the sky in vibrant colors as day turns to night. Sometimes I don’t even capture the sun in my sunset photography, just the colors of the sun on something else. Capturing this beauty in photographs can be a rewarding experience, but it requires some planning and understanding. With the right tips and techniques, anyone can create stunning images that evoke the emotional warmth of a sunset.
To help you make the most of golden hours, here are my essential tips for sunset photography (and sunrise, but I know many people don’t like to wake up early like me). From understanding the sun’s position to selecting the right camera settings, these guidelines will enhance your skills and boost your creativity. Whether you’re a beginner or an experienced photographer, there is always something new to learn about capturing the perfect sunset. I feel like I am constantly learning and experimenting since each sunrise/sunset is different! A lot of photographers edit their photos, but I don’t do that, so you won’t find any tips for post-editing here. Sorry!
This post contains affiliate links. This means if you purchase something from a link, I may make a small commission, at no cost to you. This helps me keep the site running and free.
If you like this post, be sure to sign up for my e-mail list for travel inspiration & tips, or connect with me on Facebook, Instagram, Twitter, BlueSky, Threads, or Pinterest. I also have a Facebook group where you can ask me anything travel related – and I share travel deals!
1. For the best shots, plan ahead
Capturing the perfect moment during a sunrise or sunset isn’t a simple feat of chance—it’s about planning ahead. Days before your sunset shoot, invest some time to scout out the ideal spots where the sun meets the horizon, setting the scene for a sensational sunset photo. Having the right location is as essential as the shoot itself. When traveling, we don’t always have this option, so searching the internet and social media is a great place to start.
Remember, it’s not just about the sky. Look for unique elements on the ground to frame your shots, like intriguing silhouettes or striking foreground features, to add depth and interest to your sunset photography. This may mean you bring your own items like a conch shell too!

2. Arrive Early and Stay Late
As a sunset photographer, arriving early to the place where you want to take sunset photos is key. This gives you time to walk around and pick out the best spots before the golden light begins. For sunrise photography, it’s important to remember that “sunrise time” is when the sun is coming up from the horizon. So you want to be at your location before that happens.
Remember, if you’re visiting a new spot, you might need even more time to explore. It’s also smart to set your camera and other gear up in advance, so when the perfect light shows up, you’re ready to start taking beautiful sunsets.
Don’t just leave once the sun dips below the horizon (or rises above). Staying late after the sunset can really pay off. The light keeps changing and might just create a truly stunning sunset scene. You’ll want to capture the whole process, not just the moment of sunrise/sunset, for a range of tones in your pictures. Really, the best shots might come after the sun is gone, so stick around and keep shooting! For our sunrise shoot in Hawaii, it was cloudy when the sun came above the horizon, but we stayed for a bit and the clouds parted a bit, giving us a nice sunrise.
Remember, the magic of landscape photography is often in the quiet moments before and after the spectacle. When you arrive early and commit to staying late, you allow yourself to witness and capture the full drama of the sunset shoot.
3. Know the Sun’s Position
As the main light source for outdoor photography, the position of the sun greatly influences the quality of the lighting, the length and intensity of shadows, and the range of tones in your images. Knowing where the sun will set can help you anticipate the colors in the sky, ensuring your sunset shots have that magical golden light that every sunset photographer aspires to catch.
Being aware of the sun’s position enables you to compose your photos with the right balance of light and shadow, adding depth and drama to your scene. Always remember that the position of the sun changes quickly during sunrise/sunsets, opening the door to stunning, unexpected opportunities. If you are prepared and adaptable, changes in lighting can transform a good sunrise shoot into an exceptional one.
For a landscape photographer, it’s essential to recognize the value of the sun’s position and anticipate its movements and effects. This will allow you to adjust your settings for sunsets promptly, ensuring your sunset photography captures the beauty and dynamism of the scene with the correct exposure.
Knowing the position also allows you to see when the sun will be shining on important or beautiful buildings. This sunset photo in San Marino doesn’t even have the sun in it, but you can see how it shines off the castle, and the variety of colors in the sky in the background!

4. Use the right camera
When it comes to capturing the stunning beauty of a sunset, choosing the right camera makes a significant difference. Cameras equipped with a broad dynamic range are key to sunset photography. This feature allows the camera to record a range of tones, preserving details in both the dark shadows and the bright highlights of a sunset scene. Full-frame cameras, particularly the latest mirrorless models, are often recommended for their exceptional dynamic range and superior performance in low-light conditions.
Investing in a full-frame camera is beneficial for photographers who are passionate about sunset shoots. I currently have a Canon, but many people love their Nikons. Do your research and see what you prefer! These cameras are designed to handle the challenging lighting of a sunset, ensuring that you can capture the delicate interplay of colors and contrasts without losing details. This allows you to get the correct exposure in a single frame, eliminating the need for multiple exposures or high dynamic range (HDR) techniques.
Even if you don’t have the fanciest camera, you can still take awesome travel photos with your phone. Just practice with the settings, depth of field, and auto mode. You may even be able to get wide-angle lenses for your phone. You’ll learn the skills needed here, and can adapt to your phone camera. Don’t be discouraged!
5. Shoot at a variety of focal lengths
Sunrise and sunset photography is like painting the sky with your camera – every shot can be a masterpiece. But capturing amazing sunset pictures isn’t just about timing; it’s about perspective. This is where focal lengths come into play. Catching stunning sunset shots means knowing how to use various focal lengths to compose your images. Start with a wide-angle lens, in the 10-30mm range, perfect for those vast, awe-inspiring sunset scenes where every inch of the landscape feels like part of the story. On the other hand, zoom in with a 200mm or longer lens to transform the sun into the dominant character, making it larger and more pronounced against the dwindling daylight.
The impact of different focal lengths is substantial – a photo taken at 14mm can feel worlds away from one at 200mm. Shorter focal lengths let you highlight the expansive beauty of the sunset sky, creating a dance between light, space, and silhouette. At longer focal lengths, you can isolate moments within the sunset – the way the last light caresses distant mountains or brings a cluster of leaves to life.

6. Use the rule of thirds to improve your sunrise & sunset photography compositions
Sunset photography has the power to capture the beauty of the day’s end, but composing a captivating sunset scene takes skill. A simple yet highly effective technique to elevate your sunset shots is the rule of thirds. This method involves dividing your image into nine equal segments by using two horizontal and two vertical lines. You’ll create points of interest for your sunset photos that can lead to a more balanced and eye-catching composition.
When lining up your sunrise or sunset shoot, try to place the horizon on one of the horizontal lines. This allows either the sky’s golden light or the impressive landscape to take center stage. If your camera provides a grid display, you can use this feature to guide your composition through the viewfinder or LCD screen. This is also available on most phone cameras.
For a touch of dynamism, position the most vibrant area of the sunset off to the side of your frame, on one of the vertical lines. Also, introducing silhouettes like trees or buildings can add depth and context, enhancing the storytelling element of your sunset photography. Remember, keeping your compositions in line with the rule of thirds will likely make your sunset images sunset image more aesthetically pleasing and engaging.
7. Watch Out for Lens Flare
Capturing the beautiful sunset image is fun, but as a sunset photographer, you must be wary of lens flare. Lens flare occurs when sunlight scatters inside your lens, creating unwelcome artifacts that can reduce the clarity and impact of your sunset photos. A practical solution is to use a lens hood, which can shield against direct sunlight. However, this tactic becomes limited once you start attaching filters to your lens.
Sometimes, the simplest way to combat lens flare is to adjust your position so the sun is no longer in the frame. While this might change your planned composition, it can be a necessary step for that perfect shot. If you do find lens flare in your images, don’t worry—post-processing can be your ally. By blending two or more images, it’s possible to remove or reduce the effects of lens flare, preserving the range of tones in your beautiful sunset scenes.
Keep in mind that using a UV filter might introduce more lens flare due to added reflections, especially during sunset photoshoots. Being attentive to these flare triggers and knowing how to maneuver around them is key to mastering the techniques of sunset photography.
Unfortunately, we cannot always remove them from our photos at the moment, so sometimes it’s nice to embrace them. If they’re positioned correctly, I find they add some character to the photo, but that’s my preference.

8. Experiment with different exposures (to achieve a magical result)
By playing with different exposure settings, sunset and sunrise photographers can truly capture the dynamic range of the landscape scenes before them. A simple technique is to start with a faster shutter speed and then move to a slower shutter speed, which allows more light into the camera and can make your sunset photos brighter with a luminous quality.
Modern cameras give us the flexibility to tinker with these settings easily. For example, by raising the shutter speed or narrowing the aperture, you can underexpose the image, creating a dramatic and intense sunset scene. Furthermore, using exposure compensation lets you continuously adjust the exposure to make the image brighter or darker, enhancing the photograph as the light changes.
Taking multiple shots at varying exposures can capture the best of the quickly changing light and colors. Bracketing exposures takes this concept further, letting you address the range of tones from the brightest to the darkest parts of the image. These techniques, while requiring some trial and error, can bring out the true beauty of the sunset in your photography.
9. Bracket often
Bracketing is a helpful technique for sunset photography. When you bracket, you take several photos with different exposures. This means some pictures will be brighter and some darker than what your camera says is right. This is important for sunsets because the range of light, or dynamic range, can be too big for just one photo to capture all the details in both the sky and the land in front of you.
Most modern digital cameras have a setting called automatic exposure bracketing. This lets the camera take these different photos quickly, one after the other. You can then look at them later to pick the best one or use them all to make a single picture that has the right light everywhere.
To make small changes to how light or dark your photos are, you can use something called exposure compensation. This tool works well with bracketing.
After your sunset shoot, you can use a computer program to put together the best parts of each photo. This way, you get a picture that shows the beautiful sunset just as you saw it, with rich colors and clear details everywhere. Bracketing often is one of the smart ways to do sunset photography to make sure you capture the full range of tones from the scene.

10. Auto Exposure Lock is your friend
Auto Exposure Lock (AEL) can be a photographer’s best ally when trying to capture the perfect sunset or sunrise shot. This feature on modern cameras allows you to take charge of exposure in scenes with a wide dynamic range, like those found in sunset photography. Typically, the intense contrast between the bright sky and dark landscape can confuse your camera’s metering system, leading to improperly exposed images.
However, with AEL, you have the power to select a specific part of the scene to set the correct exposure, thereby preserving the beautiful golden light and range of tones in your sunset photos. For instance, when aiming for striking silhouettes, simply point your camera at the sky’s brightest spot, engage the exposure lock, then reposition your camera to include your foreground subject, ensuring crisp silhouettes against the vivid sunset scene.
11. Experiment with different angles
When capturing the enchanting beauty of sunsets, experimenting with different angles can elevate your photography to new heights. A wide-angle lens is a powerful tool that allows you to include more of the sky and landscape, creating a sumptuous backdrop for the golden light of the setting sun. This lens choice opens up creative compositions, giving a grand scale to your sunset photography. Don’t hesitate to shift your perspective; by zooming in, you can highlight the finer details that are often missed, such as the silhouette of plants or the texture of rocks, bringing a different kind of focus to the sunset’s splendor.
12. Find a Point of Interest
Sunset and sunrise photography can bring out some of the most breathtaking moments that nature offers. A key factor is including a point of interest. This isn’t just about snapping the colors in the sky; it’s about anchoring the viewer’s attention and enhancing the overall impact of your sunset photo. Natural elements like a piece of driftwood, a shell at the beach, unique rock formations, or human silhouettes aren’t just there for decoration; they add context and depth, creating captivating sunset scenes. When composing your shots, consider how the sun’s placement and reflections interplay with these elements to create a balanced and engaging visual experience.
13. Focus on the Composition
Focus is key when framing your sunset scene. Look for natural lines—a tree branch or a winding path—to draw the eye towards a point of interest, like a rock that glows with the golden light. It’s a delicate balance to decide whether to highlight the foreground or the vibrant sky. A general tip is to avoid placing the horizon right in the middle of your shot; instead, if the sky is alight with colors, let it dominate your frame.
Experiment with your camera’s settings, trying various exposures and focal lengths. Keep shooting as the sunset light fluctuates and even after the sun dips below the horizon during the serene blue hour.
Remember to research your location before your sunset shoot. A well-chosen spot can make all the difference when the light is fleeting. And don’t shy away from weather that might seem less than ideal. Haze or a gentle fog can add a touch of mystery to your photos, enhancing the mood and depth.
14. Low light and long exposures
Capturing images in low light, especially during the serene moments of dawn and dusk, presents unique challenges and opportunities for photographers. The need for longer exposure time is often met by the use of a sturdy tripod and a remote shutter release to stabilize the camera and prevent any unwanted movement. For those scenes that require exposures longer than 30 seconds, switching to Bulb mode becomes essential, as this setting keeps the shutter open for the required amount of time to let in enough light.
As the intensity of light changes gradually during dawn and dusk, adjusting exposure by about half a stop is typically recommended for achieving the correct exposure. Once the sun has dipped below the horizon, engaging manual mode can offer the photographer increased control over the exposure settings, a critical factor as automatic metering systems might falter in low-light conditions.
To ensure crisp, clear images during these extended exposures, it is advisable to match your tripod use with shutter speeds that are lower than the focal length of your lens. This simple rule helps to avoid camera shake, a common issue that can lead to blurry images when capturing the beauty of low-light scenes.

The Best Camera Settings For Sunsets and Sunrises
Aperture
Choosing the right aperture is critical to capture the vast range of tones before you. A high aperture setting, like f/11 or f/16, is recommended for sunset shots to achieve a greater depth of field. This ensures that both the foreground elements and the distant horizon are crisply defined. For those wanting to add an artistic flair to their images, high aperture settings can also create a starburst effect when shooting directly into the sun, which can add a dynamic visual element to your sunset photography. As the natural light fades, you might find the need to gradually adjust your aperture wider to maintain the correct exposure. Aperture Priority mode can be incredibly useful here, as it offers the ability to control the depth of field, while the camera takes care of the shutter speed, simplifying the task in changing light conditions.
ISO
ISO acts as a balancing act between light sensitivity and image quality. With the diminishing light of sunset, a low to mid-range ISO setting, such as 200, 400, or 800, helps maintain image quality while providing enough sensitivity to capture the scene well. While a higher ISO can offer more flexibility in adjusting aperture and shutter speed, it can also introduce unwanted noise into the image. It is essential to find the right ISO setting that allows you to achieve a balanced exposure without compromising on the clarity and quality of your sunset photos. It’s important to remember that while the lowest ISO setting might seem ideal for quality, it may not always provide the necessary exposure for the everchanging lighting during sunsets and sunrises.
White Balance
The warm glow of a sunset can significantly affect the white balance in your photography. Auto White Balance may sometimes neutralize those beautiful golden tones, whereas manual adjustments can help to accentuate them. Settings like ‘Shade’ or ‘Cloudy’ tend to enhance the warm reds and oranges, providing that spectacular sunset warmth. For a different feel, such as a cooler, more dramatic shot, settings like ‘Incandescent’ might be worth exploring. Furthermore, shooting in RAW can be advantageous as it allows for more precise white balance adjustments during post-processing, which could be vital if the camera’s auto white balance doesn’t accurately capture the sunset’s palette.
Focus
Focusing during sunset can be tricky due to the contrast between the sunlit sky and the darker landscape. A smaller aperture (higher f-stop) helps create a wide depth of field, allowing more elements within the frame to appear sharp. It’s essential during a sunset shoot to keep both the sky and landscape details crisply in focus, especially when dealing with such a vast and layered scene. Additionally, your camera’s exposure settings might be challenged by the brightness of the sky compared to the ground. Ensuring the highlights aren’t blown out, except for the sun itself, is crucial in preserving detail. Starting with an aperture like f/11 or f/16 and adjusting as required can help you maintain focus on the nuances within the sunset landscape.

Exposure
The magic of sunset photography often lies in capturing the right exposure – a balance that accurately reflects the intensity of the sky and the subtler details of the landscape. The difference in brightness between these two areas can be substantial, sometimes around 2 stops. Utilizing aperture priority mode, where you can set the aperture and the camera adjusts the shutter speed accordingly, can help achieve balanced exposure. Exposure compensation provides an option to manually tweak the brightness of your image; use positive compensation to brighten and negative to darken the image as needed. However, for scenes with a high dynamic range – more common during sunset shooting – bracketing exposures and merging them in post-processing may be necessary to capture all the scene’s details.
RAW vs. JPEG
The format in which you capture your sunset scenes can dramatically affect the quality and flexibility of your final image. RAW files hold a vast amount of data compared to JPEGs, offering more detailed information, a wider tonal range, and better opportunities for adjusting colors and exposure. Photographers who choose to shoot in RAW will find they can recover highlights and shadows much more effectively than with JPEG files, which is particularly valuable in the challenging light conditions of sunset photography. While RAW offers these benefits, it’s also important to remember that RAW files require post-processing to reach their full potential, demanding familiarity with software like Lightroom or Photoshop. JPEGs, while more convenient and instantly gratifying to look at straight from the camera, do not offer the same level of flexibility for editing.

Final Thoughts
With these tips for sunset photography settings and techniques, you’re well-prepared to capture the stunning atmosphere of the golden hour. Remember, while the recommended settings are a great starting point, the best images often come from experimenting and discovering what works best for the unique landscape and light conditions you encounter. Happy shooting!
Save “Tips for Sunset and Sunrise Photography” for Later


About the Author

Read More About Photography Tips


7 responses to “14 Tips for Sunrise & Sunset Photography”

Very helpful post, and will be working to fine tune my camera settings for sunrise and sunset photos based on your recommendations. Thanks!

Even if you don’t do post editing, my tip is to always make sure the photo is straight or level with the horizon.

More of a sunset person and I love your tips. I just spent two weeks in hospital and whenever I could, I would hobble across the street to the beach and take a photo of the setting sun – would have loved your tips then, but was clever enough to shoot RAW so I see what editing software can get out of the shots.

These tips are super helpful. Thank you for sharing!

These tips are great! I am definitely going to use them for my next sunset photoshoots!

These tips are such a thoughtful and practical guide for anyone looking to improve their sunrise and sunset photography! Planning ahead and scouting out ideal spots is so important, especially when trying to capture the magic of those fleeting golden hours. Arriving early and staying late really helps to make sure you don’t miss out on any of those unexpected moments that can turn a good shot into something truly breathtaking. And your insight into understanding the sun’s position is spot on—it really makes all the difference in capturing the perfect balance of light and shadow. Thank you for sharing these invaluable techniques!

Sunset photography tips like planning for golden hour and scouting compositions ahead of time really make a huge difference in capturing that perfect light.
It’s amazing how small adjustments in timing and camera settings can transform a simple sunset into something truly breathtaking.
These kinds of practical tips inspire me to get out there and experiment with my own shots!
Have You Seen These Yet?


Hey there! I’m Pamela. Just a woman who has fallen in love with getting lost around the world. I’ve traveled to 42 countries across 7 continents.
My mission? To inspire you to ‘let the bucket list flow’ and see what the world has to offer.
My promise: All of my photos are not edited. What you see is what you get.
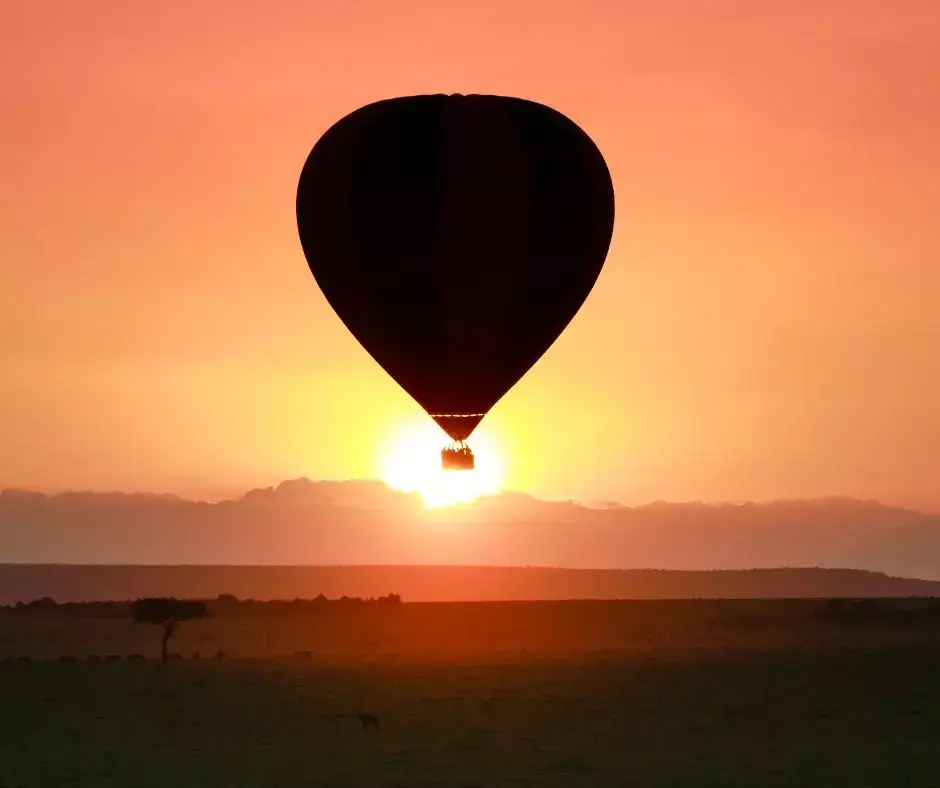
Join a small-group safari to Kenya & Uganda!
- Go trekking and get close to gorillas and chimpanzees
- See the big 5 Safari Animals
- See The Great Migration
- Sunrise hot air balloon ride and champagne breakfast included
- Maximum of 12 guests
Capital Cities book

- Discover the world through this 258 page book covering 118 cities
- 3 photos by me!
- Perfect as a gift or for your coffee table
Travel Shop
- Accommodation Comparison Excel
- Printable Bucket Lists
- Travel Planning Resources
- & More!
Leave a Reply